How to Use the Partition Assistant to Resize a Partition?
Resize partition is not easy to computer green hands. Usually, resizing operation covers both extending and shrinking operation. With the partition assistant, the resize operations C: drive have been completed successfully!
AOMEI Partition Assistant Professional, as a partition manager, which specializes in accomplishing all operations in disk partition management. It is easy and reliable to resize, create, delete, format partition and more advanced partition operations. As we know, resize partition can not be supported by earlier Disk Management snap-in in Windows XP, 2000, 2003 especially when you want to resize encrypted partition. Luckily, AOMEI Partition Assistant has the functions which the Windows "Disk Manager" doesn't have.
Partition Assistant allows you to resize the partition with low disk space safely. Usually, resize operation covers both extend and shrink operation. First of all, You need to install the software.
1. Launch AOMEI Partition Assistant as administrator privilege and you will enter the main window. (I suggest you close all other programs before launching the software.)
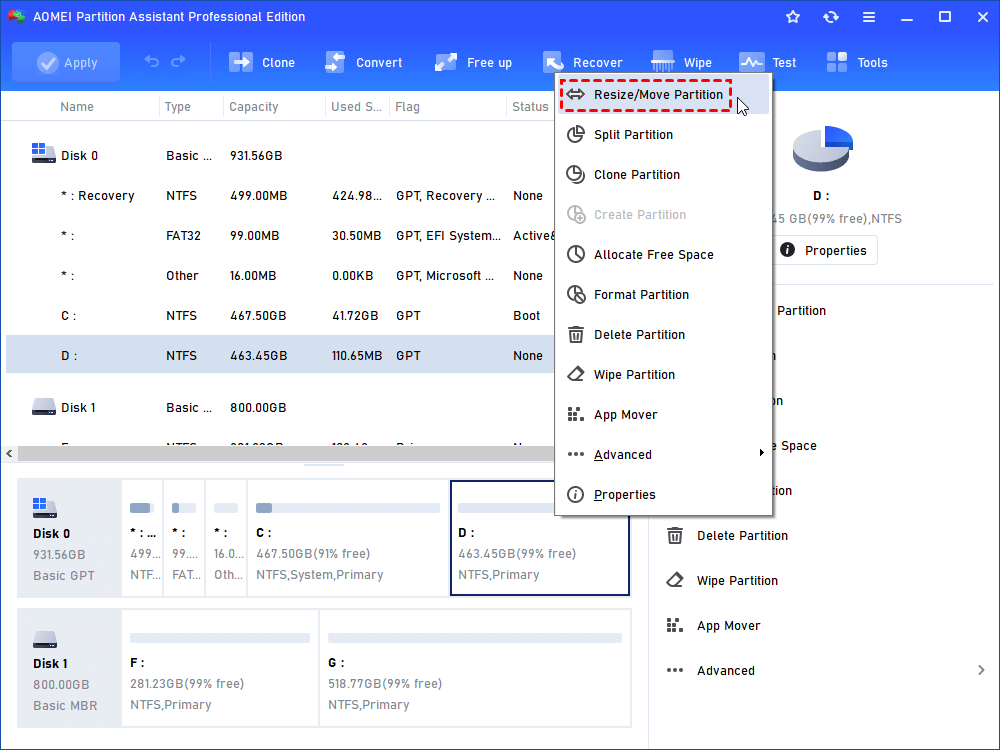
2. Select D: partition. Right click on it and select "Resize/Move Partition" in the drop-down menu.
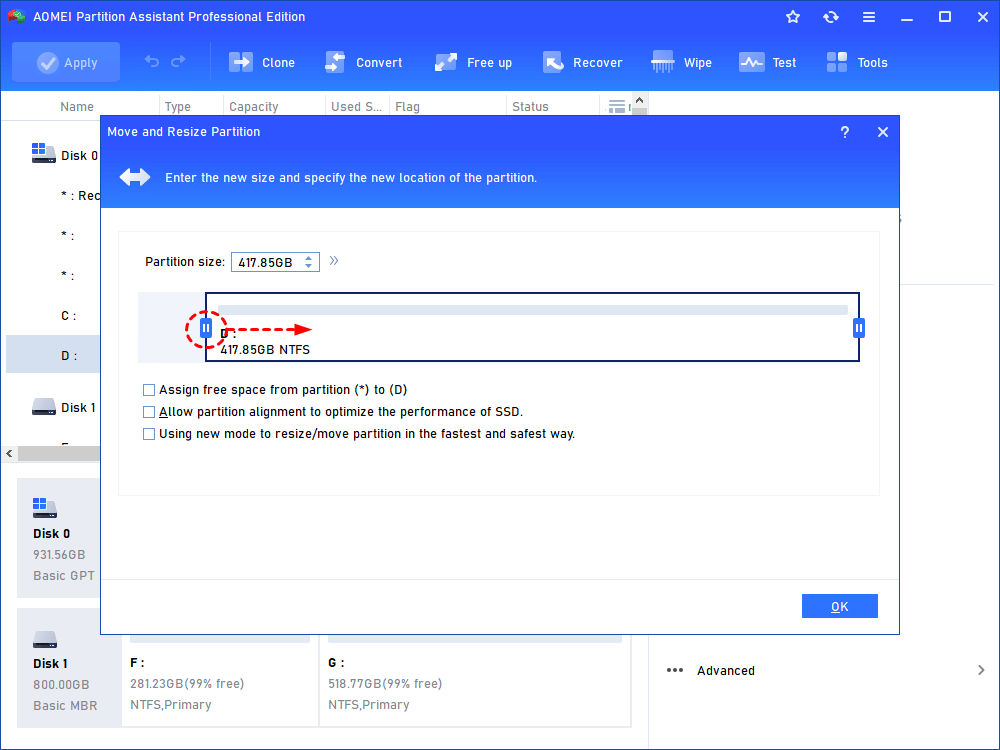
3. In the pop-up window, position the mouse pointer on the left handle and drag the slider bar rightwards to shrink D: partition as shown below:
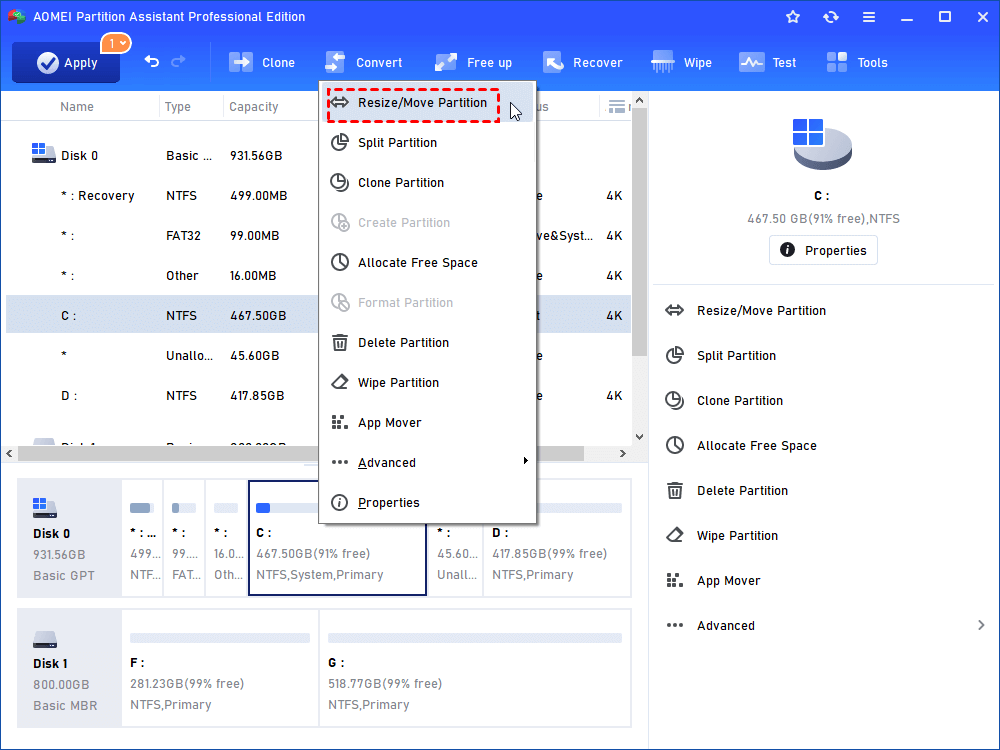
4. Click "OK" button to return the main window. There will be a block of contiguous unallocated space behind C: drive. Then, right click C: drive, select "Resize Partition" drag the right slider bar rightwards to extend partition.
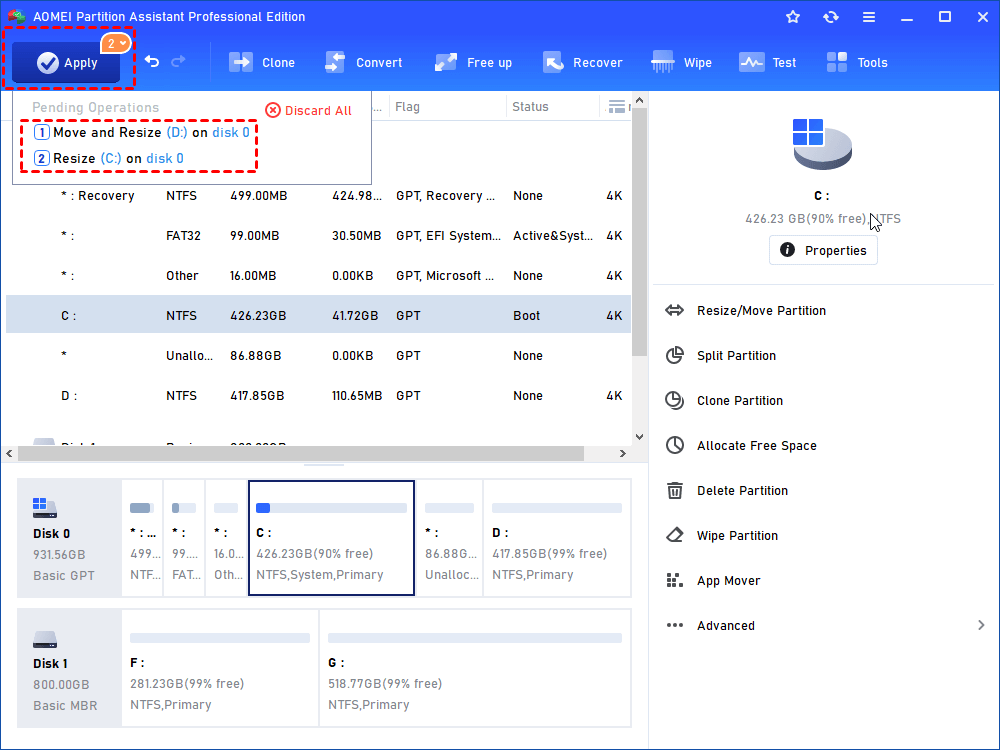
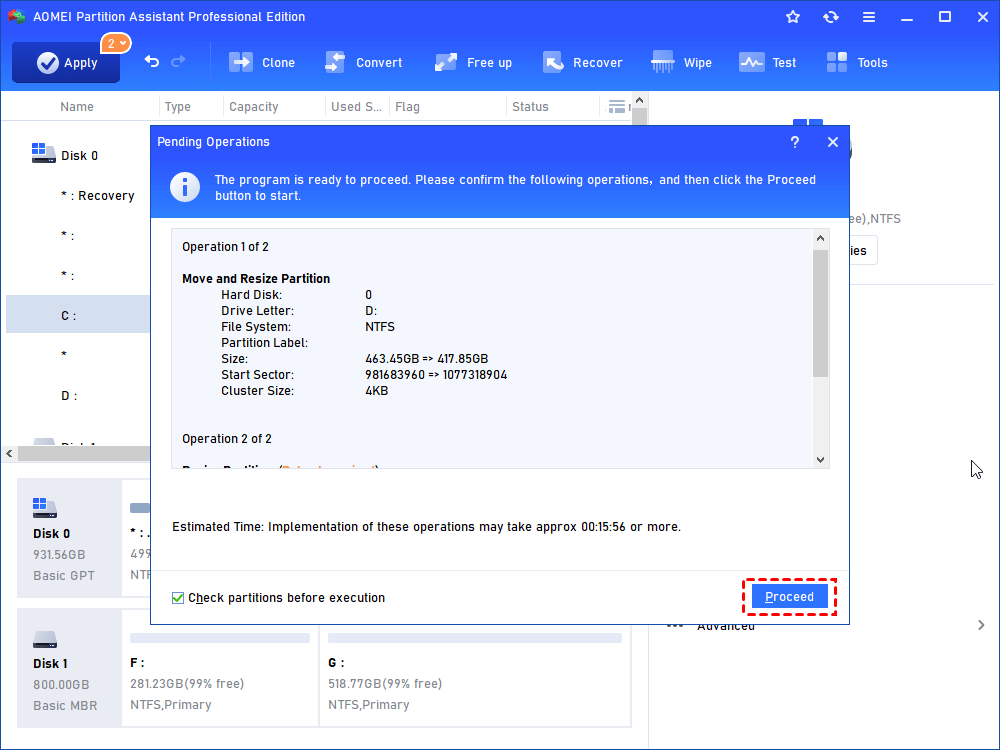
5. To save all changes, do not forget to click "Apply" button on the toolbar. After that, click "Proceed" button to move forward with the process.
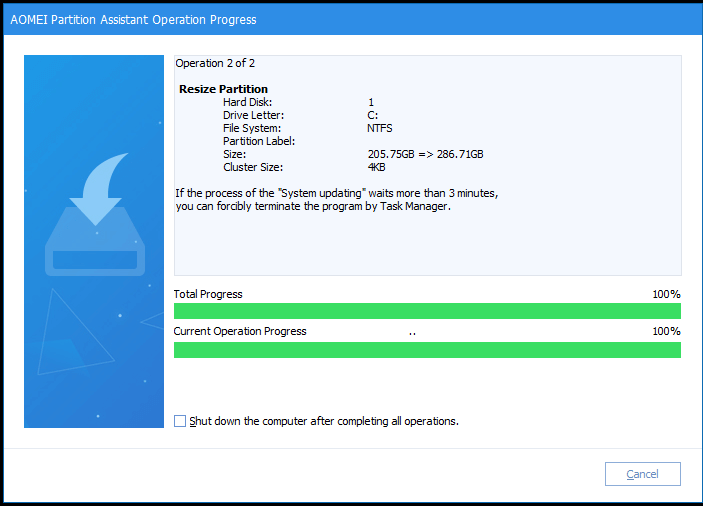
When all operations are finished, AOMEI Partition Assistant will give you a report. Hereto, resizing partition operations have been completed successfully! Besides, no reboot is necessary.
In fact, it's not easy and safe for most individual users to resize partition, because improper partition resizing operation may cause data loss and endanger the whole system. Therefore, you need to choose reliable and professional partition software to do this for your computer running Windows 8, 7, Vista, XP, 2000 and Windows Server 2000, 2003, 2008. AOMEI Partition Assistant is designed for computer green hands and IT professionals.
 Download AOMEI Partition Assistant Professional Demo Edition
 Buy AOMEI Partition Assistant Professional Edition (Price: US $54.95)