Refer to the following help documents to better make use of AOMEI Partition Assistant for overall data protection. Contact us if you have any further question via [email protected]
How to Extend System Partition for Windows 10/8/7 and Windows Server?
How to extend system boot partition on basic disks with Windows partition manager for Windows 8/7/XP/2000/Vista, and Windows Server 2000/2003/2008/2016/2019? This article will guide you the most easily, efficiently and directly way to resize partition.
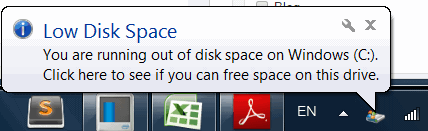
As applications continue to be installed into the Windows system, one day, suddenly you will find that the system and/or boot partition do not have enough free disk space, and when every time the system starts, Windows always prompts the following information:
You are running out of disk space on SYSTEM (C:), To free space on this drive by deleting old or unnecessary files, click here…
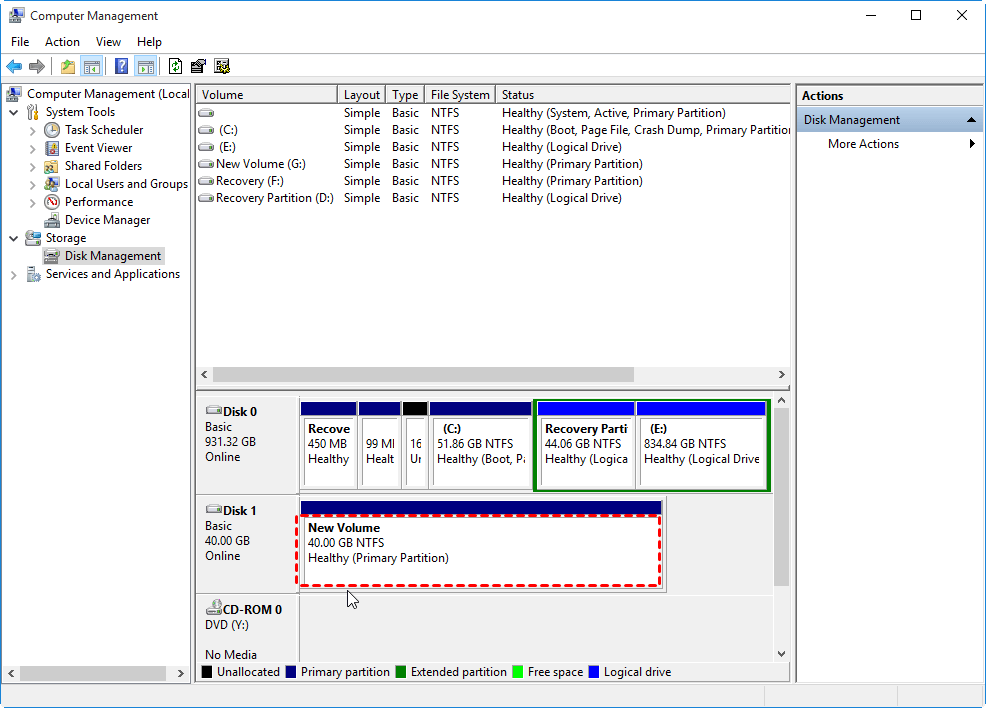
In this case we have to delete the unwanted files for getting more free space and ensuring Windows normal operations, however, deleting files is not the best way. If my system disk has a total of 931.32GB - the system boot partition (C: drive) is only 51.86GB and 834.84GB was allocated to data partition E:. It is clear that E: partition space is large enough, and now the best solution is to allocate 100GB (even more) from the E: to C: by extending system partition. You can permanently solve the problem by using the Extend Partition Wizard of AOMEI Partition Assistant which is considered as a helpful Windows partition manager. Here is the partition layout of my system disk before extending system volume as shown below:
Top 3 Solutions to Resize Partition without Losing Data
Extend system partition by allocating free space of AOMEI Partition Assistant.
AOMEI Partition Assistant Pro Edition is specially designed for extending system boot partition and other partitions on a disk for Windows 10/8.1/8/7/XP/Vista 32 & 64 bit. It can fully utilize the free/unallocated space on the disk to meet your needs. The program will automatically shrink large partitions to release more space and then increase the size for your appointed partition. It's easy and safe without losing data, without reformatting partition. Besides, this Windows partition manager also could assist you to realize more advanced partition operations.
Step 1.Download AOMEI Partition Assistant and run it , right-click the partition which you want to allocate free space from and select "Allocate Free Space". (As you can see from the following screenshot, I choose D partition as the source partition.)
Step 2. As a result of step 1, you will get a pop-up window. Type in the size of the free space which you want to cut from D partition and this free space will be directly added into the destination partition. (Take the following screenshot as an example - I will allocate 243.81 GB’s free space from D partition to C partition.)
Step 3. You can take a preview of the operation result before confirming start. Click "Apply" to execute this operation. In the pop-out window, you can see how much time it will cost you to finish this operation. You can also tick "Check partitions before execution" to go through the partition in case of any error in it. In default, this option is ticked.
Step 4. Then, extending system partition is complete successfully!
As a top Windows partition manager, AOMEI Partition Assistant is more flexible for you to choose which partition for resizing, just operate these functions such as extend, shrink, move, split, merge, copy partitions, etc in griphic interface. Right click the target partition, you will see the functions listed: Resize, Move, Split, Merge, Allocate Free Space, Copy, and in the "Advanced" menu option, you can Change Drive Letter, Hide/Unhide Partition, Set Active Partition, Covert Partition Type, Convert File System, Check Partition, Wipe data.
For all sizes of Enterprise, AOMEI Partition Assistant Unlimited Edition supports all Windows operating systems and allows unlimited usage within one company to save time and money.
For IT service providers, AOMEI Partition Assistant Technician Edition is the most cost-effective hard disk partition management toolkit, especially designed for IT consultants.
Resize Partition via AOMEI Partition Assistant Main Window
Case Study - Resize Partition: When you need to increase system partition size and there is a partition next to it, please do as the following steps:
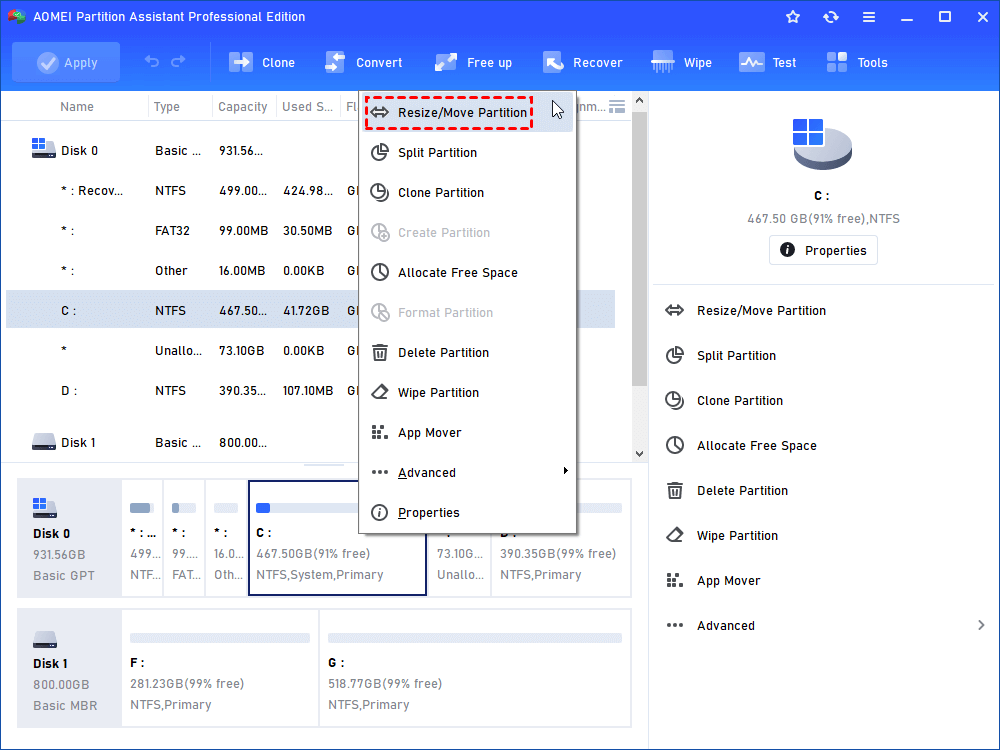
Step 1. Install and launch AOMEI Partition Assistant. In the main console you could view the whole partition configuration. In this demonstrator, there is an unallocated space behind C drive. Then, right-click the partition (here is C drive) you want to extend and select "Resize/Move Partition".
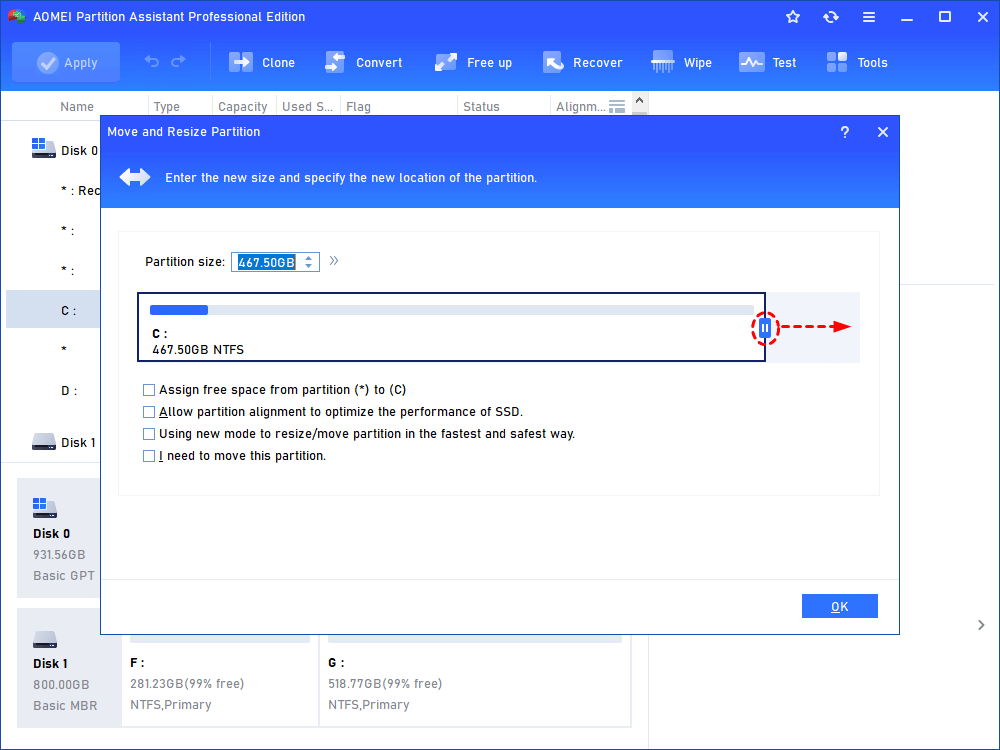
Step 2. In the pop-up window, position the mouse pointer on the right border of the partition and drag the border rightwards to extend partition. Then click "OK". (If there's no unallocated space beside the partition, you could not drag the border).
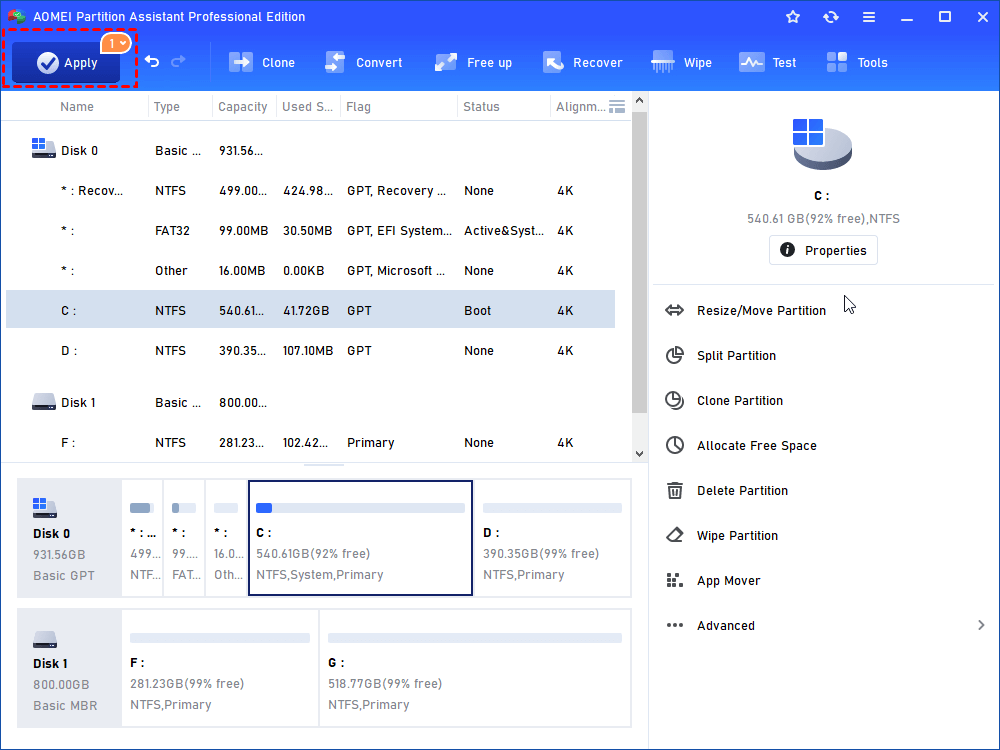
Step 3. Then it will back to main console and you could preview the partition be extended. Click the "Apply" on the toolbar to commit the operation.
For all sizes of Enterprise, AOMEI Partition Assistant Unlimited Edition supports all Windows operating systems and allows unlimited usage within one company to save time and money.
For IT service providers, AOMEI Partition Assistant Technician Edition is the most cost-effective hard disk partition management toolkit, especially designed for IT consultants.
How to Extend Volume with Windows Built-in Disk Management?
To extend system boot partition and increase its free space in Windows 2000, Windows XP and Windows 2003 is very difficult in the past time, because their built-in Disk Management did not provide the functions of extending partition or shrinking partition, this would have to use third-party tools such as Partition Magic, Disk Director, and other partition management software to accomplish.
However, in Windows Vista, Windows Server 2008, Windows 7, Windows 8 and Windows 10 times, Extending Volume is no longer a difficult task, because their Disk Management have been built in the functions such as extending volume and shrinking volume, and also include extending system partition, which is easy to use without relying on 3rd party partition utilities. It's able to extend primary partition and logical partition.
1. Launch Windows built-in Disk Management to extend C: drive
Click Start Menu -> Control Panel -> System and Maintenance -> Administrative Tools -> Double Click Computer Management -> Storage -> Disk Management. Or directly type "diskmgmt.msc" to Start Menu ->Run.
2. Shrink Volume to generate unallocated space
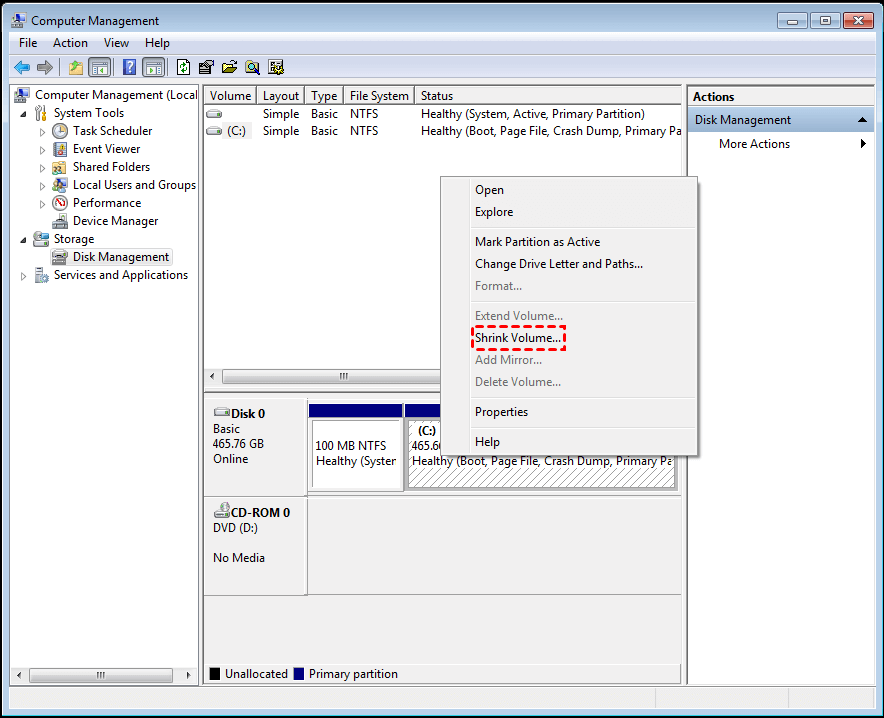
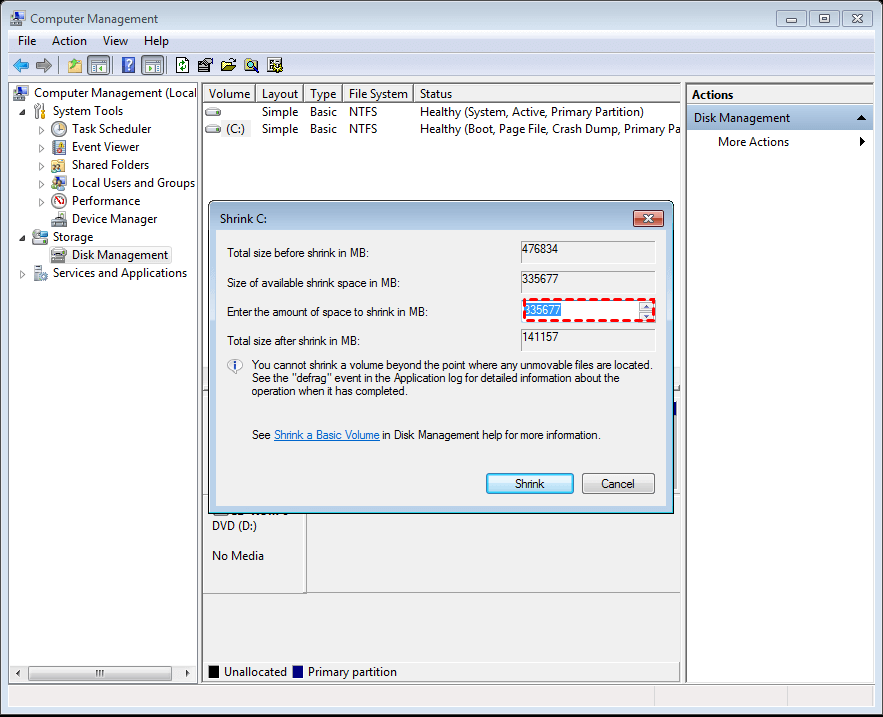
Step 1. Launch the Disk Management, right click the partition you want to shrink and select "shrink volume".
Step 2. In the pop-up window, you could shrink the size within the available shrinking space, then click the "shrink".
Step 3. After the operation finished, you may find the new unallocated space is behind the partition.
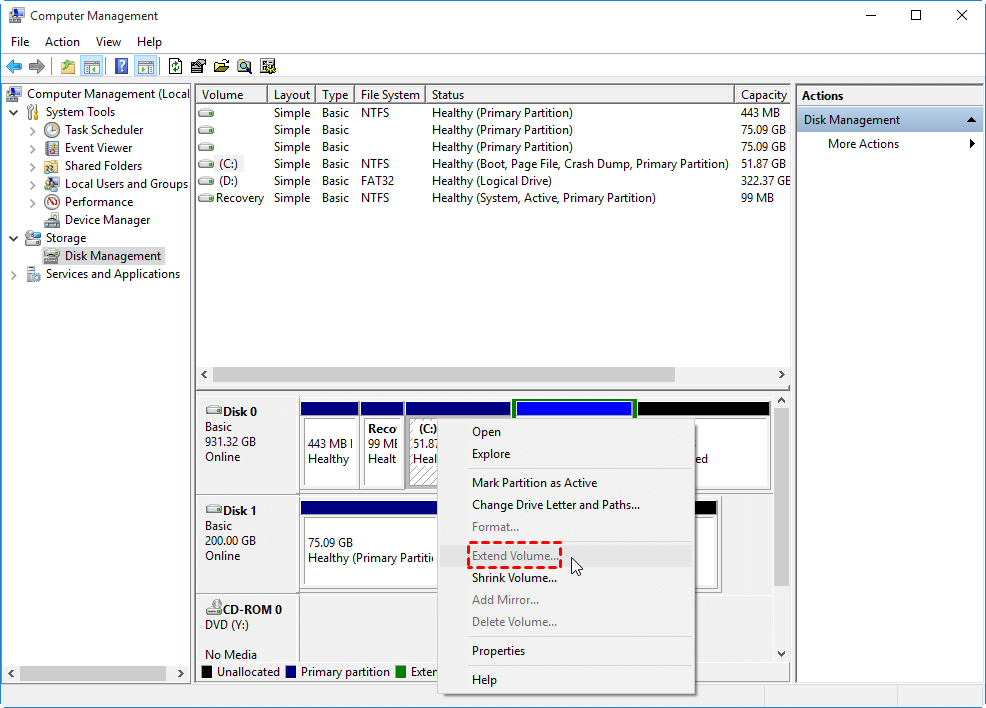
3. What can we do when Extend Volume is greyed out in Disk Management?
Then right-click the system boot volume (C:) you want to extend, but you will find "Extend Volume ..." is a grayed out and unusable state, how is this going on, can not be extended? The screenshot is as follows:
In fact, it is not impossible to extend system partition (C:), but to activate "Extend Volume" option have an rule. Rule is: Disk Management tool is only able to extend the volume with focus into "next contiguous unallocated space", in other words, there must be unallocated disk space at the right side of the partition that you want to extend. Because there is no "next contiguous unallocated space" at the right side the (C:) partition drive, so "Extend Volume" option is grayed out.
3. Generate a contiguous unallocated disk space to extend system partition
The only way is to delete the partition (here's D) between system drive and unallocated space. You can copy all data of D: partition to another partition or an external hard drive. After that, deleting D: partition so that the system partition can be enlarged with the "next contiguous unallocated space".
Note: Please try Windows Partition manager, AOMEI Partition Assistant to directly extend your system partition if contiguous unallocated space can not be generated.
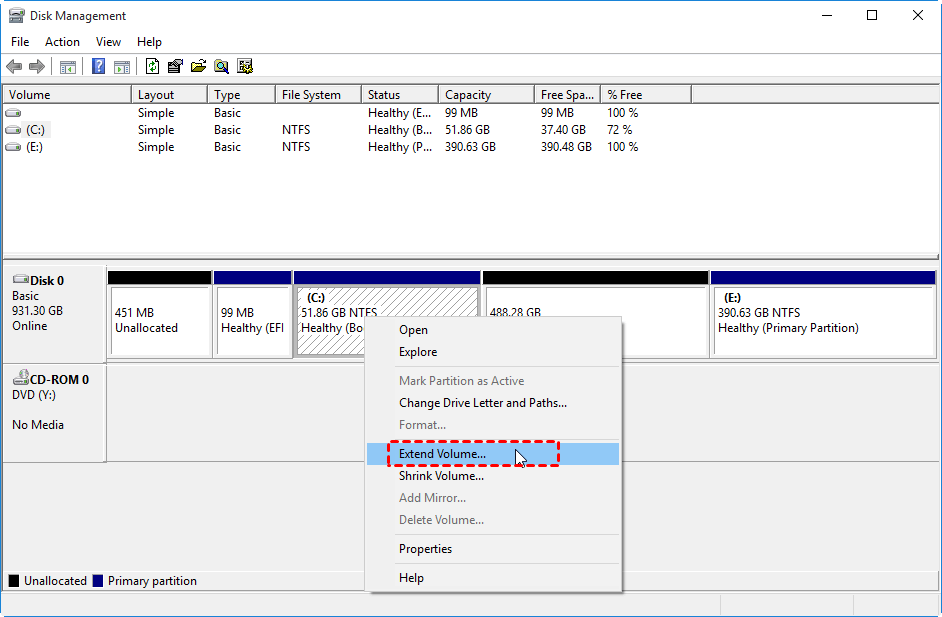
4. Extending system boot partition
After deleting (D:) partition, you can extend system partition now. Select system partition C: drive, and then, right click on it and choose "Extend Volume...".
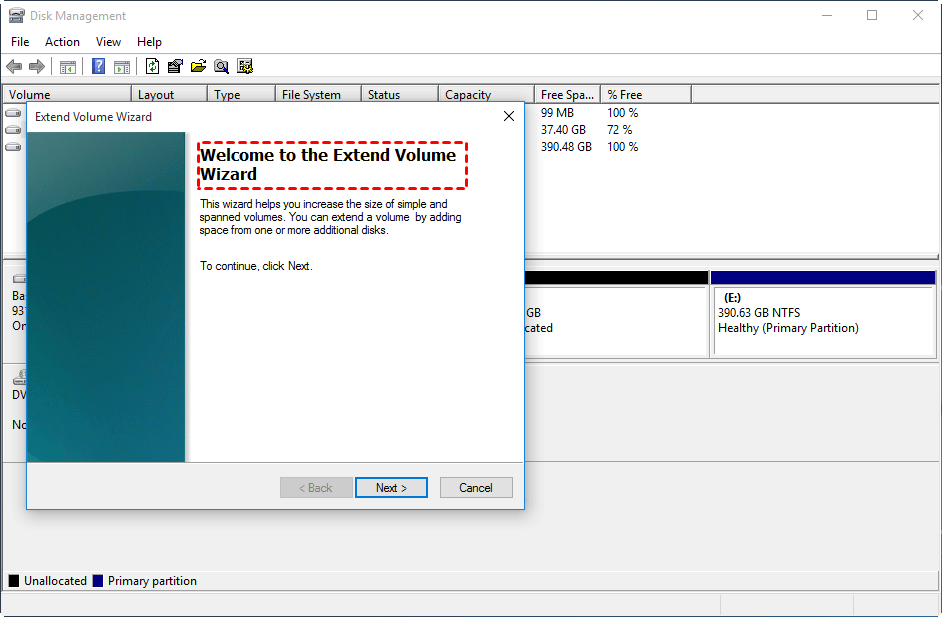
After clicking "Extend Volume" option, it will pop out "Extend Volume Wizard" to help you finish the operation.
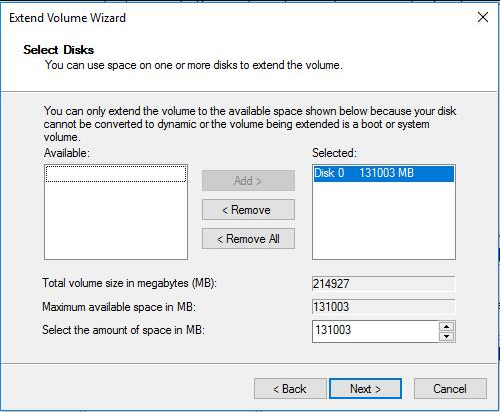
In this window, select the disk(s) from which we want to get free space. And you can specify how much free space adds into the C drive. And click "Next".
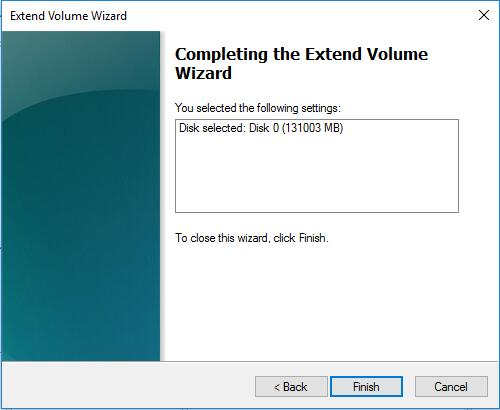
Check the setting. And click "Finish". When the process is completed, your C drive will be extended, and D will be deleted.
How to Extend Volume by using Diskpart Command Line?
Extending a partition or volume can be done via DiskPart.exe, or command line interface. This work can be done in both Vista, Windows Server 2008, Windows 7 and Windows 8. Start with the following steps:
Click Start and type CMD, then press Enter.
In the command prompt type
DISKPART.exe
Select the right hard disk and partition to work on. Typically this should be disk 0 and partition 1.
SELECT disk 0
SELECT partition 1
Note: You may want to execute a "LIST" command to view your existing disks and partitions before attempting to expand volume. Needless to say, if you don't have any space you can use on the same disk, you will not be able to extend the partition any further. So no real harm can be done here.
LIST disk
LIST partition
When the right disk and partition were selected, execute the "EXTEND" command. If you don't specify the size to extend by, then the command will extend the partition by using all of the contiguous space available on that disk.
EXTEND
The above command will enlarge the partition by using all of the contiguous space available on that disk.
EXTEND size=2048
The above command will enlarge the partition by 2048MB (increase 2GB free space to the partition that you were selected).
Expanding system partition from my experience
1). There must be some contiguous unallocated disk space after the partition that you want to extend by using Windows built-in Disk Manangement. If there is no contiguous unallocated space you can directly use the outstanding Windows partition manager to realize the expansion.
2). When no contiguous unallocated space, there are two ways of releasing a contiguous space to extend system boot partition.
A. The easier way: Copy all data and files in D: drive to an USB hard disk (or other external disks), right-click D: drive and click "Delete Volume…" to generate a contiguous unallocated space.
B. Troublesome way: Shrink the D: drive partition to create new partition (e.g. E: drive), move D: drive data and files to E: drive, and apply "Delete Volume…" in D: drive.
3). Windows Disk Management can not move partitions from one location to another location, which is one of its disadvantages.
4). Windows 2000/XP/2003 Disk Management does not support for extending partition and shrinking partition, only the Vista/2008/Win7/Win8 are able to extend volume and shrink volume on the basic disk.


 Download AOMEI Partition Manager to Try
 Buy AOMEI Partition Assistant Professional Edition (Only US $54.95)